iOS is very rich in UI elements, but when it comes to the Drop-Down list/menu there is no support for it. Drop-Down is using in almost all kinds of apps and these Drop-Down are of different kinds with different apps. In apps, drop-down shows the list of elements, simple labels, switch, or any other design as required in the apps.
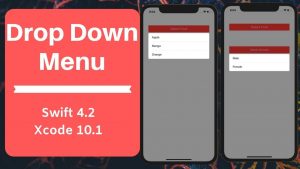
In this tutorial, we are going to learn about how we can create a Dropdown List/Menu in Swift. We will cover 2 types of drop-downs in which first, we show a list of items and second we show a simple label with some kind of animations.
If you want to watch the video tutorial of this article, here you go:
1. Create a New Swift Project
Open Xcode, Select App and click on next and give a proper name to the project and make sure to select the user interface should be Swift, and create the new project. Give the name according to your need.
2. Create Basic UI
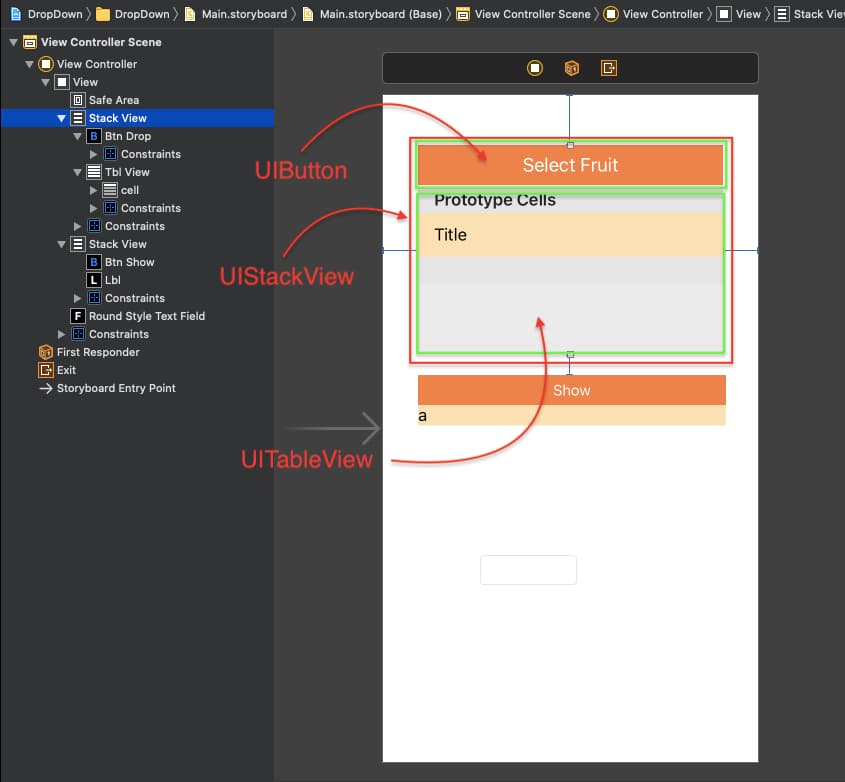
First, we create the basic UI for the required functionality. So for creating the list of fruits, we need to take one UIButton and UITableView and group both into UIStackView(Vertically). Similarly, we need to take on UIButton and UILabel and put them together into the UIStackView(Vertically) as you can see in the image. So there are 2 UIStackView on the screen and give some horizontal spacing between them.
We are taking things in the UIStackView because We want to show some animation when use tap on any of the button and views will come with some animation. You can see the views hierarchy in the image to understand the design.
3. Create Outlet’s and Action’s
Now, we have to create the Outlet’s and Action’s of the UI elements, so we can assign the values and properties to these elements. We also configure some properties of these UI elements in the viewDidLoad() method. So when the view gets initialize it will set up the UI elements.
@IBOutlet weak var btnDrop: UIButton!
@IBOutlet weak var tblView: UITableView!
@IBOutlet weak var btnShow: UIButton!
@IBOutlet weak var lbl: UILabel!
@IBAction func onClickDropButton(_ sender: Any) {
// Action for Select Fruit Button
}
@IBAction func onClickShow(_ sender: Any) {
// Action for Show Buttons
} override func viewDidLoad() {
super.viewDidLoad()
tblView.isHidden = true
lbl.isHidden = true
lbl.text = "This is Simple Drop Down in which you can change according to your requirment. Dont Forget to #SUBSCRIBE #SHARE #COMMENT #LIKE"
// Do any additional setup after loading the view, typically from a nib.
} 4. Defining Actions and Animations
Now, we have to define the animation for both the stack view, so when user press any of the button animations get to perform. So for performing animation we have to create one function, which takes 2 parameters of Bool type and UIButton type. Bool parameter uses to hide or show the drop-down and button parameter is used to get which button is clicked.
We have to first detect which button is clicked and on the bases of button we will hide/show the view in the stack view and perform animation on that view.
func animate(toogle: Bool, type: UIButton) {

       if type == btnDrop {

           if toogle {
               UIView.animate(withDuration: 0.3) {
                   self.tblView.isHidden = false
               }
           } else {
               UIView.animate(withDuration: 0.3) {
                   self.tblView.isHidden = true
               }
           }
       } else {
           if toogle {
               UIView.animate(withDuration: 0.3) {
                   self.lbl.isHidden = false
               }
           } else {
               UIView.animate(withDuration: 0.3) {
                   self.lbl.isHidden = true
               }
           }
       }
}
We will call this method whenever the user clicks any of the buttons. So for calling these methods we need to define this method into the actions.
@IBAction func onClickDropButton(_ sender: Any) {
      if tblView.isHidden {
           animate(toogle: true, type: btnDrop)
      } else {
           animate(toogle: false, type: btnDrop)
      }
}
@IBAction func onClickShow(_ sender: Any) {
if lbl.isHidden {
animate(toogle: true, type: btnShow)
} else {
animate(toogle: false, type: btnShow)
}
} We are all done with the functionality, the only thing which is remaining, the UITableView population. If you have also taken the table view then you can follow the below code, otherwise, you can run the app to test it with your updates.
We are also updating the UIButton title as use will click any of the fruit and we will call the animation method to hide the view again.
extension ViewController: UITableViewDelegate, UITableViewDataSource {
     func tableView(_ tableView: UITableView, numberOfRowsInSection section: Int) -> Int {
         return fruitList.count
     }

     func tableView(_ tableView: UITableView, cellForRowAt indexPath: IndexPath) -> UITableViewCell {
         let cell = tableView.dequeueReusableCell(withIdentifier: "cell", for: indexPath)
         cell.textLabel?.text = fruitList[indexPath.row]
         return cell
     }

    func tableView(_ tableView: UITableView, didSelectRowAt indexPath: IndexPath) {
         btnDrop.setTitle("\(fruitList[indexPath.row])", for: .normal)
         animate(toogle: false, type: btnDrop)
     }
}
If you want to create a drop down menu with list only and more animation you can check this article.
Now we can run the project and check the complete functionality.
Download Resources for How to Create Drop-Down List/Menu in Swift
You can download the source code of How to Create Drop-Down List/Menu in Swift project from this Link.
I hope you like this tutorial and if you want any help let me know in the comment section.
Stay tuned, there is way more to come! follow me on Youtube, Instagram, Twitter. So you don’t miss out on all future Articles and Video tutorials.
. . .
I am delighted that you read my article! If you have any suggestions do let me know! I’d love to hear from you. ????

About the Author
Shubham Agarwal is a passionate and technical-driven professional with 5+ years of experience in multiple domains like Salesforce, and iOS Mobile Application Development. He also provides training in both domains, So if you looking for someone to provide you with a basic to advance understanding of any of the domains feel free to contact him


It is really a great and helpful piece of information. I抦 glad that you shared this helpful info with us. Please keep us informed like this. Thank you for sharing.
This website was… how do I say it? Relevant!! Finally I have found something that helped me. Thanks a lot!
Wow! After all I got a website from where I know how to truly take useful information concerning my study and knowledge.
Howdy! I could have sworn I’ve been to this blog before but after looking at a few of the posts I realized it’s new
to me. Regardless, I’m definitely delighted I came across it and I’ll be
bookmarking it and checking back frequently!
Hey very nice blog!