Having a collection view inside table view has become a very common design pattern. Many of the applications are already using this kind of pattern in their apps like Spotify, App store, etc. Adding collectionView inside tableView is not a complex functionality but managing actions and data is a little tricky.
This kind of functionality is useful when we have to show a vertical list (UITableView) with a horizontal list(UICollectionView). In which we have added collectionView inside tableView.
In this article, we will see how we can add collectionView inside tableView and take action on the cell.
Note: This article is not for beginners, you much to have a basic understanding of CollectionView and TableView.
Here’s is the video if you prefer video over text:
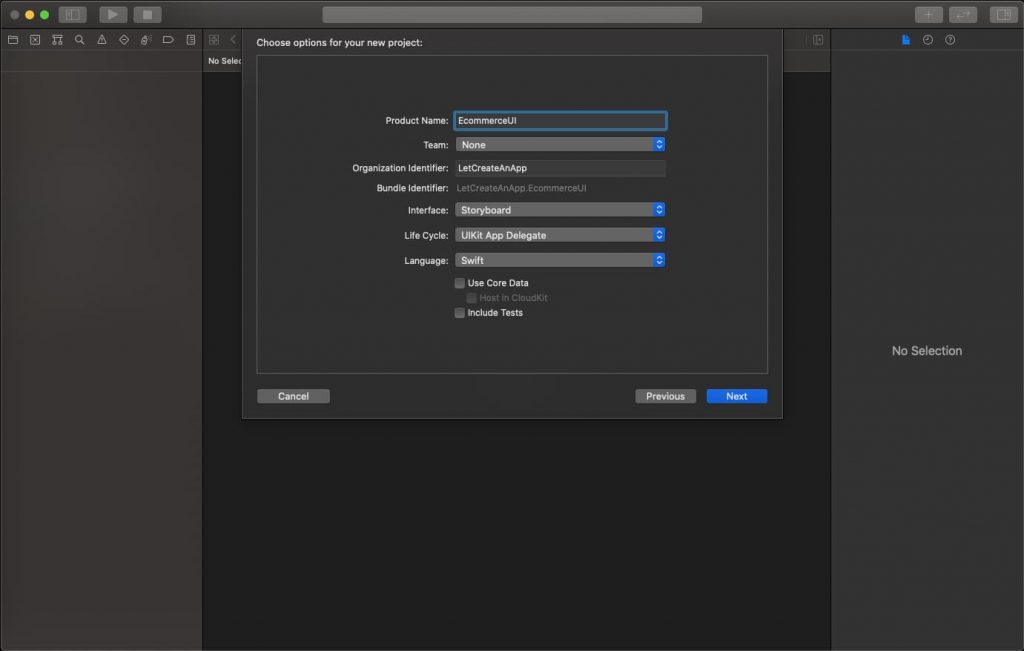
1. Create a New Swift Project
Open Xcode, Select App and click on next and give a proper name to the project and make sure to select the user interface should be Swift, and create the project.
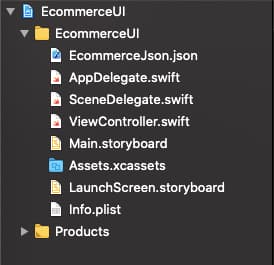
2. Add Images and Json file
You need to add the Images and JSON file into the newly created project, you can also download the starter project which has all the Images and JSON files.
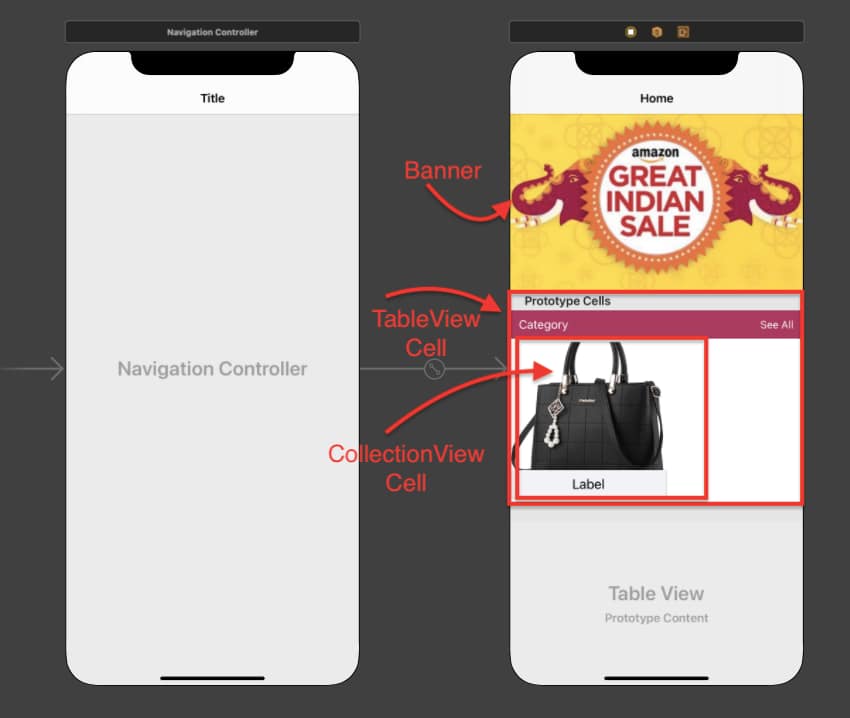
3. Design the Basic Layout
First, we have to design the layout in the Main.storyboard file. In which we have to drag and drop one UITableView and UICollectionView in TableView Cell as shown in the figure.
Now we have to move on to the view and load the Ecommerce.JSON file and populate the UITableView with the Json Data. We need to create the Codable model to parse the JSON object.
struct ProductModel: Codable {
     var response: [Product]?
 }

struct Product: Codable {
     var categoryName: String?
     var products: [ProductDetails]?
 }

struct ProductDetails: Codable {
     var name: String?
     var imageName: String?
     var price: String?
     var description: String?
 }
Now, we need to create one variable and put all the JSON data into this variable and we will use this variable to pass the respective tableview cell data.
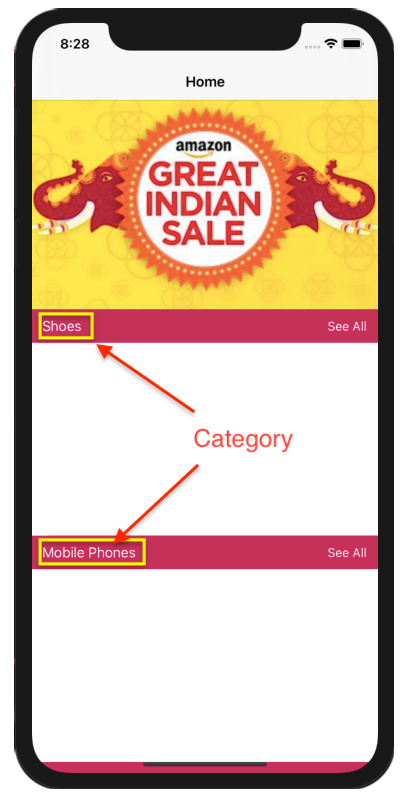
var productData: ProductModel? Initially, we will only show the category name because it is part of the UITableview cell and, the product image and name are part of the UICollectionView cell so it will only show when we load the collection view.
Pass the JSON data into the tableview cell and show the category name.
cell.products = productData?.response?[indexPath.row] Now get the data into the table view cell class and update the category name.
var products: Product? {
         didSet {
             categoryName.text = products?.categoryName
             collectionView.reloadData()
         }
} 
4. Load the CollectionView and Show Data
The collection view is part of the UITableView cell class, so all the functionality related to the collection view will be written in the table view cell class. We will pass all the row data into the cell class and from there it will load the collection view as data will set into the model object.
extension ProductsTableViewCell: UICollectionViewDelegate, UICollectionViewDataSource {
     func collectionView(_ collectionView: UICollectionView, numberOfItemsInSection section: Int) -> Int {
         return products?.products?.count ?? 0
     }

     func collectionView(_ collectionView: UICollectionView, cellForItemAt indexPath: IndexPath) -> UICollectionViewCell {
         guard let cell = collectionView.dequeueReusableCell(withReuseIdentifier: "ProductCollectionViewCell", for: indexPath) as? ProductCollectionViewCell else {
             return UICollectionViewCell()
         }
         cell.productName.text = products?.products?[indexPath.row].name
         cell.img.image = UIImage(named: products?.products?[indexPath.row].imageName ?? "")
         return cell
     }

} 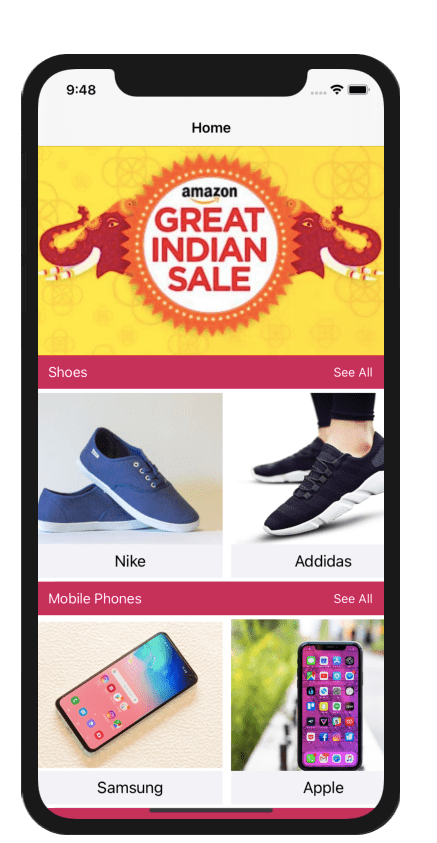
This will successfully load the data into the collection view and show all the products which are coming into the API.
5. Product Listing & Product Details
Now we will look around how to create and show the product listing when the user clicks on to See All button and product details when the user clicks on the Product itself.
First, we create the product listing design and product details design onto the Main.storyboard.

Create two classes for seperate screens, ProductListViewController.swift for product listing & ProductDetailsViewController.swift for product details screen.
In these classes take the outlet for TableView and implement the data source and delegate method of table view.
When the user clicks on See All button, we will pass all the data related to that category to the ProductListViewController.swift file, we load this data into the table view of ProductListViewController.swift file.
var productsListing: Product? Use productsListing property to load the table view.
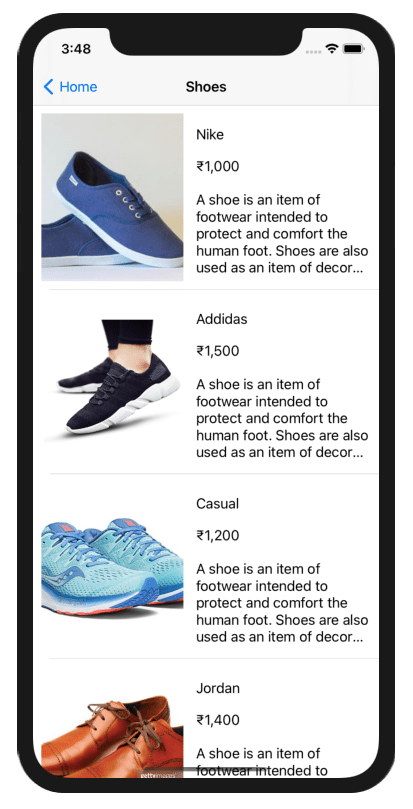
You can update the design of the table view cells according to you need.
Now, we will move on to the product detail screen when we click on the table view cell. Implemented one more delegate method of the table view, didSelectItemAt to push the user on the details from the listing.
func tableView(_ tableView: UITableView, didSelectRowAt indexPath: IndexPath) {
         guard let vc = storyboard?.instantiateViewController(identifier: "ProductsDetailsViewController") as? ProductsDetailsViewController else {return}
         vc.productDetails = productsListing?.products?[indexPath.row]
         navigationController?.pushViewController(vc, animated: true)
     }
We will land on the product detail screen.
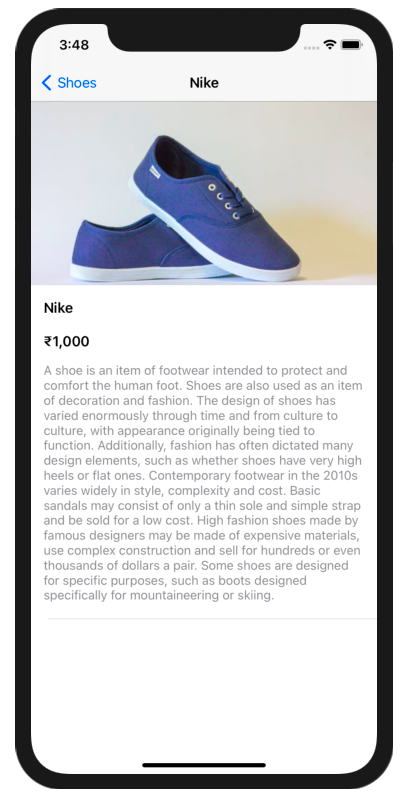
6. Product Detail from Home
We can also move on Product Details from Home is a little tricky, because the cells which are showing on the home screen are of the collection view, so we will not able to get the action of the collection view cell on the view controller directly.
We need to define the closure property which will take the index of collection view cell and table view cell class and pass these indexes to the ViewController.swift class.
var didSelectClosure :((_ tableIndex: Int?, _ collectionIndex: Int?) -> Void)? So, we need to pass the click action of the collection view cell from the collection view to the table view cell and from the table view cell class to view the controller using a closure.
func collectionView(_ collectionView: UICollectionView, didSelectItemAt indexPath: IndexPath) {
         didSelectClosure?(index, indexPath.row)
     }
We will get this closure in ViewController.swift file in table view delegate method.
cell.didSelectClosure = { tabIndex, colIndex in
           if let tabIndexp = tabIndex, let celIndexp = colIndex {
           self.moveOnProductDetails(tindex: tabIndexp, cindex: celIndexp)
             }
         }
We need to define one method which will push the user onto the product detail screen.
func moveOnProductDetails(tindex: Int, cindex: Int) {
         guard let vc = storyboard?.instantiateViewController(identifier: "ProductsDetailsViewController") as? ProductsDetailsViewController else {
             return
         }
         vc.productDetails = productData?.response?[tindex].products?[cindex]
         navigationController?.pushViewController(vc, animated: true)

     }
Now we can run the project and check the complete functionality.
Download Resources
You can download the source code of Add CollectionView inside Tableview project from this Github link.
I hope you like this tutorial and if you want any help let me know in the comment section.
Stay tuned, there is way more to come! follow me on Youtube, Instagram, Twitter. So you don’t miss out on all future Articles and Video tutorials.
. . .
I am delighted that you read my article! If you have any suggestions do let me know! I’d love to hear from you. ????


Thank You
Pingback: Adding Support of Dark Mode in iOS App in Swift - Let Create An App
Pingback: Adding UICollectionView to UITableView Cell in Swift 5 - Let Create An App