With iOS 13.0 a new feature has introduces called Dark Mode. It allows adding a dark theme to iOS and the same for your app. It’s a great addition to give to users, so they can experience your app in the dark design. In Dark Mode, user can select their interface style as dark or light then the app will change its interface in the selected style. Adding Support of Dark Mode in iOS App in Swift allows us to automatically convert the complete user interface into the dark with a single click.
In this tutorial, we will see how we can add support of dark mode in iOS Applications and how we can convert our present app to dark mode. We will also see how we can enable dark mode directly from the app, not from the settings app.
This app is the part of Add CollectionView inside TableView cell, in which we have learned how we can implement UICollectionView inside the UITableView cell. You can implement dark mode in that app also.
If you want to watch the video tutorial of this article, here you go:
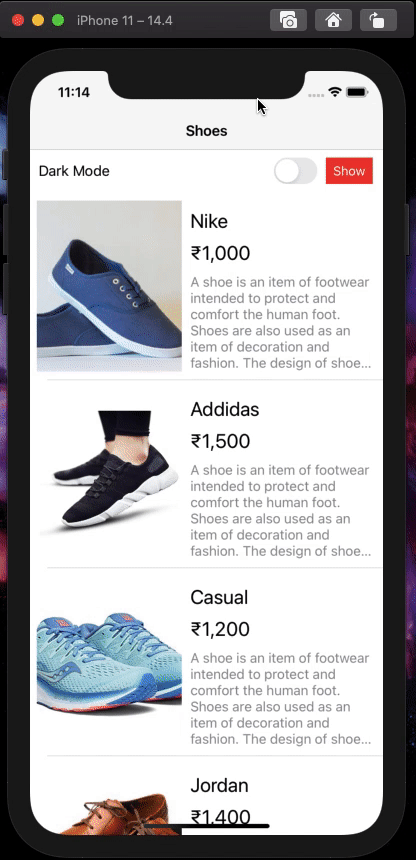
Final Output:
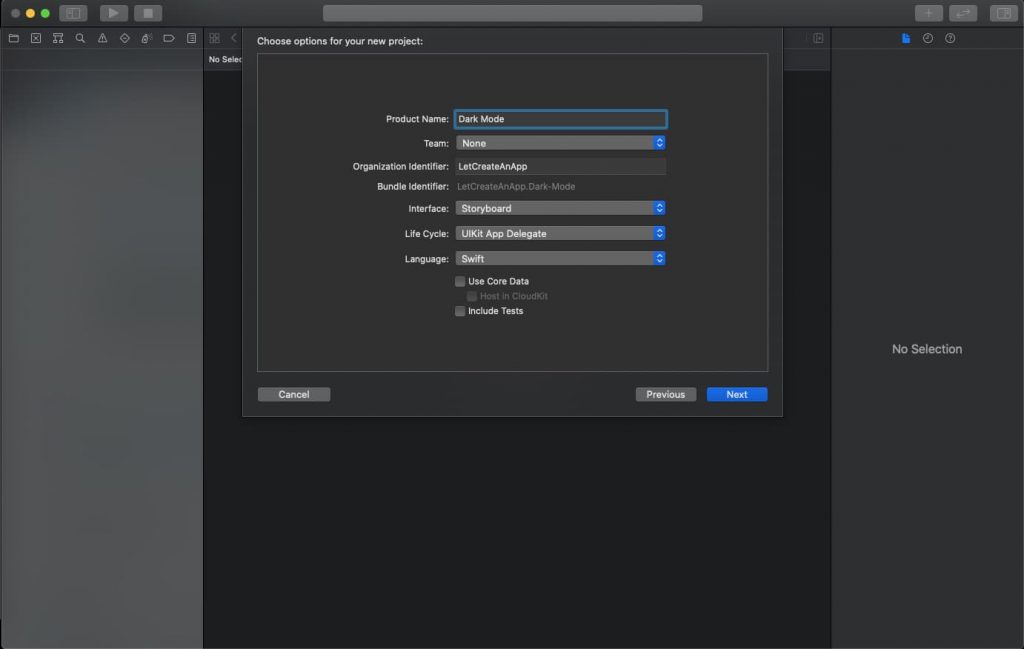
1. Create a New Swift Project
Open Xcode, Select App and click on next and give a proper name to the project and make sure to select the user interface should be Swift, and create the project.
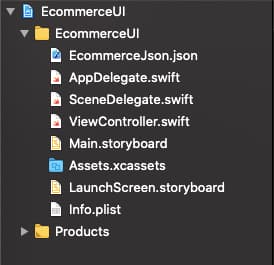
2. Add Images and Json file
You need to add the Images and JSON file into the newly created project, you can also download the starter project which has all the Images and JSON files.
3. Dark Mode with Default Colors
For switching between the Dark Mode & Light mode, we have taken a UISwitch. When UISwitch is On then the complete interface will be converted into Dark mode and vice versa. You can also design as per your need, this UI is just for demo purposes. Make sure the default property of state should be OFF for UISwitch.

We also need to take the action of the UISwitch & Show button on the view controller.
@IBAction func onClickSwitch(_ sender: UISwitch) {

    // Code to related to switch functionality goes here.

}

@IBAction func clickOnShowButton(_ sender: Any) {

    // New screen functionality goes here.

}
Now first, we are going to use UISwitch to convert the light interface into the dark. Put the below code into the action of UISwitch.
if #available(iOS 13.0, *) {
     let appDelegate = UIApplication.shared.windows.first
         if sender.isOn {
            appDelegate?.overrideUserInterfaceStyle = .dark
              return
         }
     appDelegate?.overrideUserInterfaceStyle = .light
     return
}
As we already learned that dark mode comes with iOS 13 and the upper versions, so first we need to implement iOS 13 check, so if an iOS version is iOS 13 or higher, then only complete code works.
After that, we are getting the first window from the array, and assigning that into the appDelegate variable.
Now, we have to transform the UI into the dark if the UISwtitch Button is ON otherwise, we have to change it to light.
overrideUserInterfaceStyle property has come with almost every view. If we want to change the view or controller in dark mode only, then we can use this property to convert the UI directly without changing the complete UI.
You can run the application and test the functionality, it will work great.
4. Dark Mode with Custom Colors and Icons.
In the previous section, we have seen how we can use dark mode on default colors, But mostly our application consists of custom colors and we need to provide them via coding or RGB or Hex code.
So first design the basic UI which appears on the show button. You can simply use UIView anywhere on the screen as per your need.
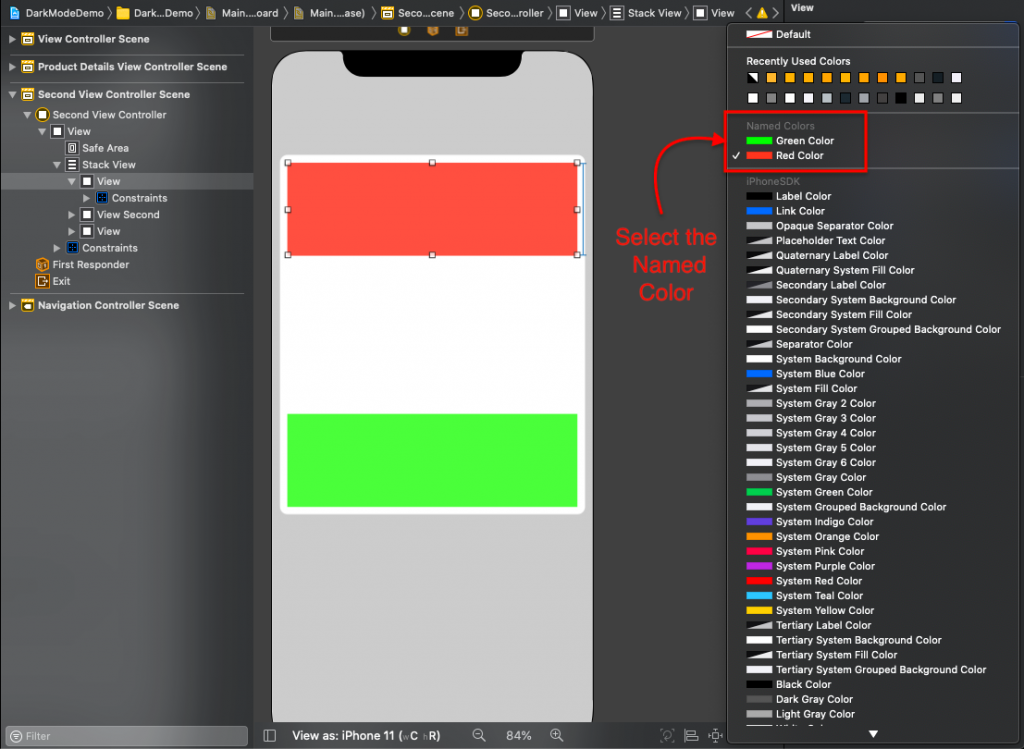
Now, let create new Color Set in asset folder and in the color set we have to define the dark and light color.
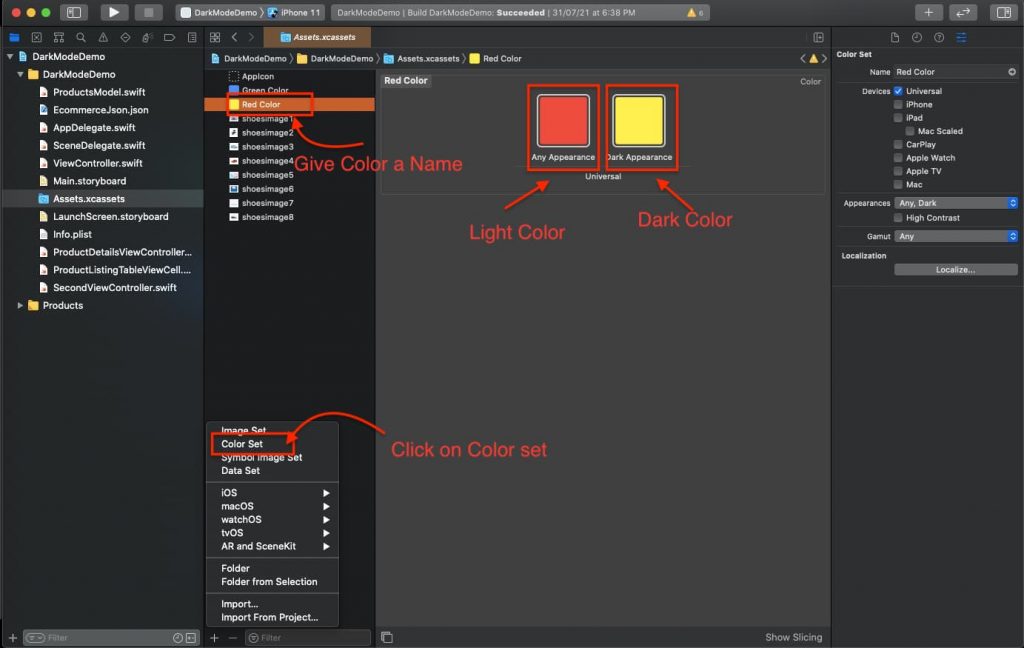
In a similar way, you can create more color sets and can assign them directly to the views on the storyboard. This is also called Named Color and you can see these colors on the storyboard with the name we have given them on the assets folder.
We need to repeat the same process for the icons, which are using in the app. We need to create an image set, as we create a color set and define the dark and light images in that set.
If you know run the application, then you can see the views will change their color as mode changes.
For debugging the UI in the dark mode, we have already given an appearance panel at the bottom side of the storyboard, from which we can change the device and apperiance.

5. Dark Mode Programmitically
Sometimes we come up with situations where we need to define the color programmatically, in that case, we have a way by which we can define colors programmatically, so whenever the mode gets changed it will convert the UI interface style. But it has restrictions, it only works on the current screen, so if we want to change the interface style for the complete App, we need to implement a Notification observer to update the colors of all the views in the app.
extension UIColor {

   static func setColor(lightColor: UIColor, darkColor: UIColor) -> UIColor {
        if #available(iOS 13, *) {
            return UIColor{ (traitCollection) -> UIColor in
                return traitCollection.userInterfaceStyle == .light ? lightColor : darkColor
            }
        } else {
            return lightColor
        }
    }

}
We are creating the extension of UIColor and creating one static function in that. This function returns the color as per the userInterfaceStyle.
Usage of the above function.
<Any View>.backgroundColor = UIColor.setColor(lightColor: <Color Literal>, darkColor: <Color Literal>)Now you can run the application and test the complete functionality.
Download Resources for Adding Support of Dark Mode in iOS App in Swift
Download the source code of Adding Support of Dark Mode in iOS App
I hope you like this tutorial and if you want any help let me know in the comment section.
Stay tuned, there is way more to come! follow me on Youtube, Instagram, Twitter. So you don’t miss out on all future Articles and Video tutorials.
. . .
I am delighted that you read my article! If you have any suggestions do let me know! I’d love to hear from you. ????

About the Author
Shubham Agarwal is a passionate and technical-driven professional with 5+ years of experience in multiple domains like Salesforce, and iOS Mobile Application Development. He also provides training in both domains, So if you looking for someone to provide you with a basic to advance understanding of any of the domains feel free to contact him