In this tutorial, we will dive into the fundamental of @State property wrapper in SwiftUI. we will also learn what is @State and how we can use it.
If you want to watch the video tutorial of this article instead, here you go:
Requirments
You need macOS Catalina and Xcode 11 or above in order to have SwiftUI work in the simulator.
1. Create a New SwiftUI Project
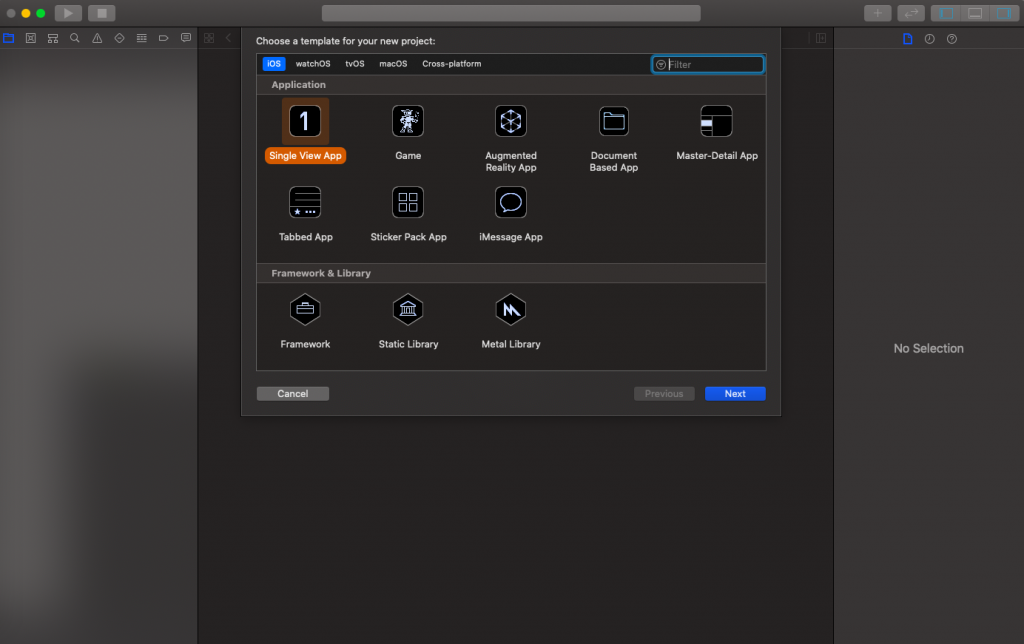
Open Xcode 11 and select a Single View Application and click on Next.
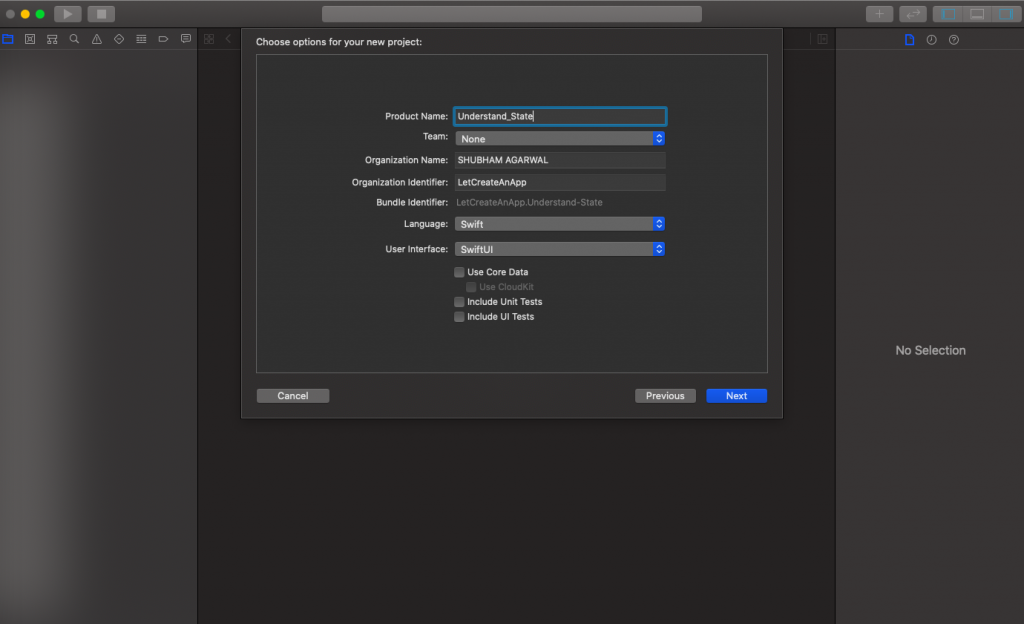
Next, give a proper name to the project and make sure to select the user interface should be SwiftUI, and create the project.
2. Create a Button View & Text View.
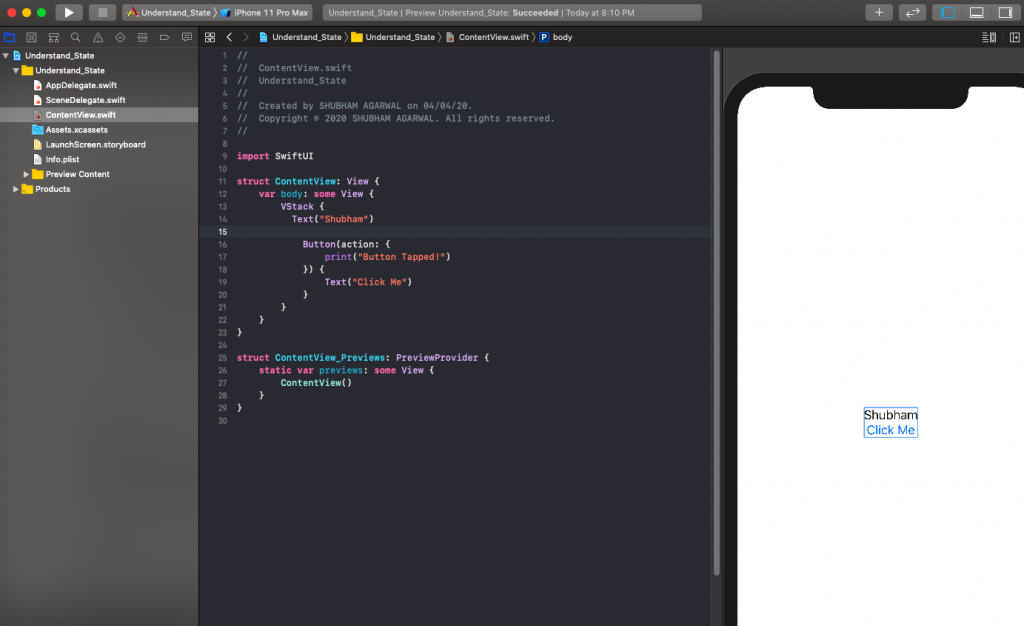
After creating the project you will get various files but you need to focus on the Content.swift file, we write code on this file. Let’s add Button & Text View in the Content.swift file.
import SwiftUI

struct ContentView: View {
    var body: some View {
        VStack {
          Text("Shubham")
            Button(action: {
                print("Button Tapped!")
            }) {
                Text("Click Me")
            }
        }
    }
}

struct ContentView_Previews: PreviewProvider {
    static var previews: some View {
        ContentView()
    }
}
So now let see what we have done so far, we have created a VStack that allows us to arrange views in a vertical stack and we have put Text View and Button View in the vertical stack.
You can see SwiftUI strongly focusing on Closures and Views.
As we can see Button View initiated with two closures. The first one will execute when button tapped and the other one returns the View which defines the appearance of that button.
If you go ahead and run the code you will see output something like this:
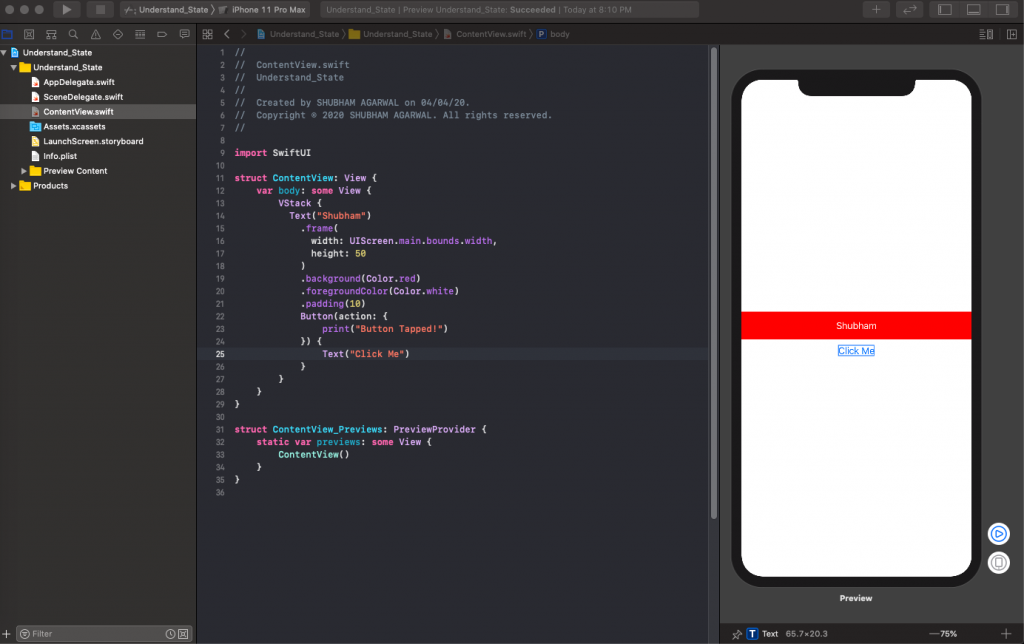
Let apply some styling to TextView so it will look nice.
import SwiftUI

struct ContentView: View {
    var body: some View {
        VStack {
          Text("Shubham")
            .frame(
              width: UIScreen.main.bounds.width,
              height: 50
            )
            .background(Color.red)
            .foregroundColor(Color.white)
            .padding(10)
            Button(action: {
                print("Button Tapped!")
            }) {
                Text("Click Me")
            }
        }
    }
}

struct ContentView_Previews: PreviewProvider {
    static var previews: some View {
        ContentView()
   }
}
These are the simple methods that are applied to the Text view. If you feel this code is quite complex, don’t worry this is just new to you, take your time and try different values.
With this code, our application looks like this:
3. Understand @State
When we look at our code, we have just simply designed. Now we need to pass the value into the Text View whenever the user taps on the Click Me button.
So let’s define a variable with name “name” and function that changes it.
import SwiftUI

struct ContentView: View {

    var name: String = "Shubham"

    var body: some View {
        VStack {
            Text(name)
                .frame(
                    width: UIScreen.main.bounds.width,
                    height: 50
            )
                .background(Color.red)
                .foregroundColor(Color.white)
                .padding(10)
            Button(action: {
                self.changeName()
            }) {
                Text("Click Me")
            }
        }
    }

    func changeName() {
        name = "Leonardo DiCaprio"
    }
}

struct ContentView_Previews: PreviewProvider {
    static var previews: some View {
        ContentView()
   }
}
Xcode should prompt an error: Cannot assign to property: ‘self’ is immutable.
That’s because structs can not mutate there own properties/variables as they are value type. For making things mutable in struct we need to put @State in front of the variables which we want to update at run time.
When the state updates the view invalidates itself and render again and update itself.
Put the @State before the “name” variable and give it a try it will change the name from “Shubham” to “Leonardo DiCaprio” when you hit the Click Me button.

When app started it will show the default value that is “Shubham” and when you tap the button it will change to “Leonardo DiCaprio“. When we clicked on that button it will update the @State variable to new value “Leonardo DiCaprio” and when there is any change in state variable it will re-render the view and display the new value.
So let’s create an array and change the value in variable randomly.
import SwiftUI
struct ContentView: View {

   @State var name: String = "Shubham"

    var body: some View {
        VStack {
            Text(name)
                .frame(
                    width: UIScreen.main.bounds.width,
                    height: 50
            )
                .background(Color.red)
                .foregroundColor(Color.white)
                .padding(10)
            Button(action: {
                self.changeName()
            }) {
                Text("Click Me")
            }
        }
    }

    func changeName() {
        let nameArray = ["Shubham", "Leonardo DiCaprio", "Will Smith", "Brad Pitt", "Johnny Depp"]
        name = nameArray.randomElement() ?? ""
    }
}

struct ContentView_Previews: PreviewProvider {
    static var previews: some View {
        ContentView()
    }
}
Now you should end up having a View that automagically re-renders as soon as you change your variable that has @State in front of it and you should be able to switch to random names from your list by tapping the button.
. . .
This article is to get you started with State — there is way more to come! You can follow me on Youtube, Instagram and Twitter to not miss out on all future Article and Video tutorials.
. . .
I am really happy you read my article! If you have any suggestions or improvements of any kind let me know! I’d love to hear from you!