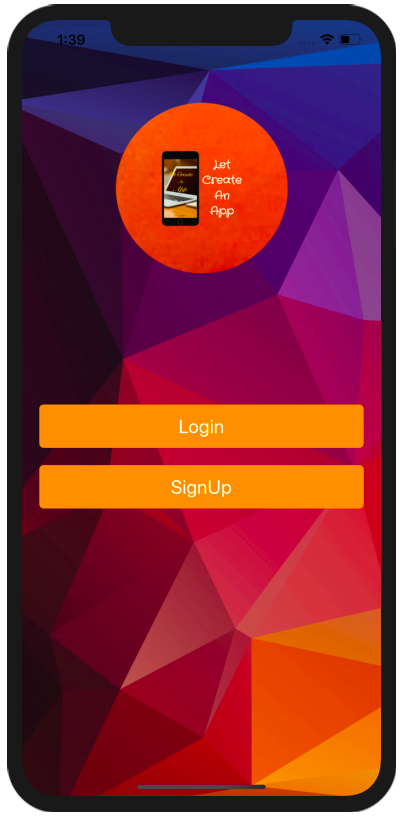
Using stacks in SwiftUI allows us to arrange views in a single view with some properties like HStack allow us to arrange views in the horizontal line. VStack allows us to arrange views in a vertical line. But sometimes we are required to put one view on top of another view like Text on Image at this time ZStack plays its role and it allows us to overlay its child views on top of each other. Stacks can further be customized with alignment and spacing in order to modify their appearance. In this tutorial, we will see how we can use ZStack to overlay views on top of one another. We will create a login screen with a background image to understand ZStack.
If you want to watch the video tutorial of this article instead, here you go:
Requirments
You need macOS Catalina and Xcode 11 or above in order to have SwiftUI work in the simulator.
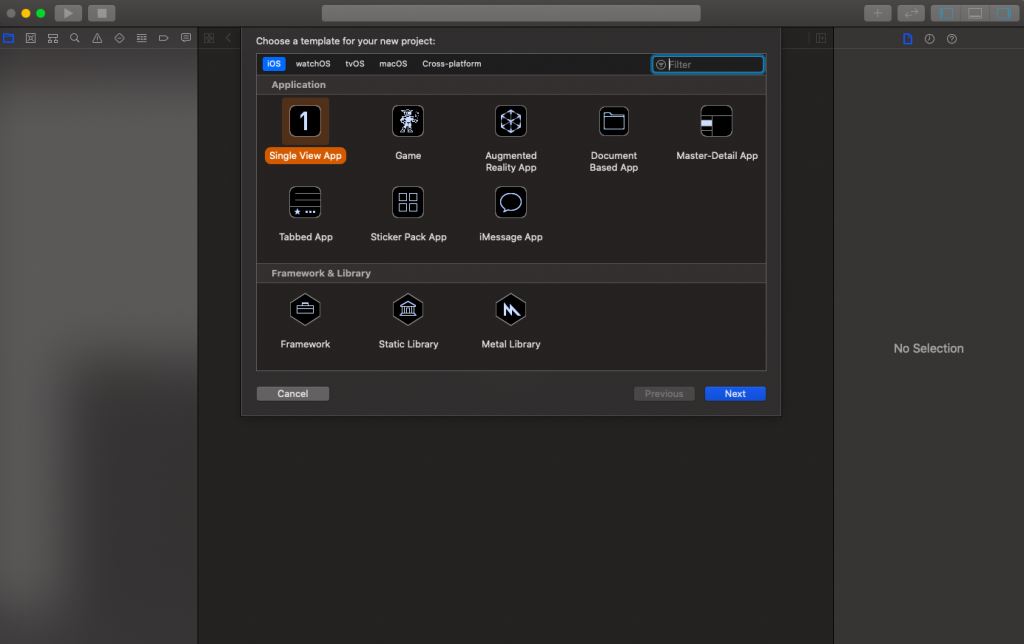
1. Create a New SwiftUI Project
Open Xcode 11 and select a Single View Application and click on Next.
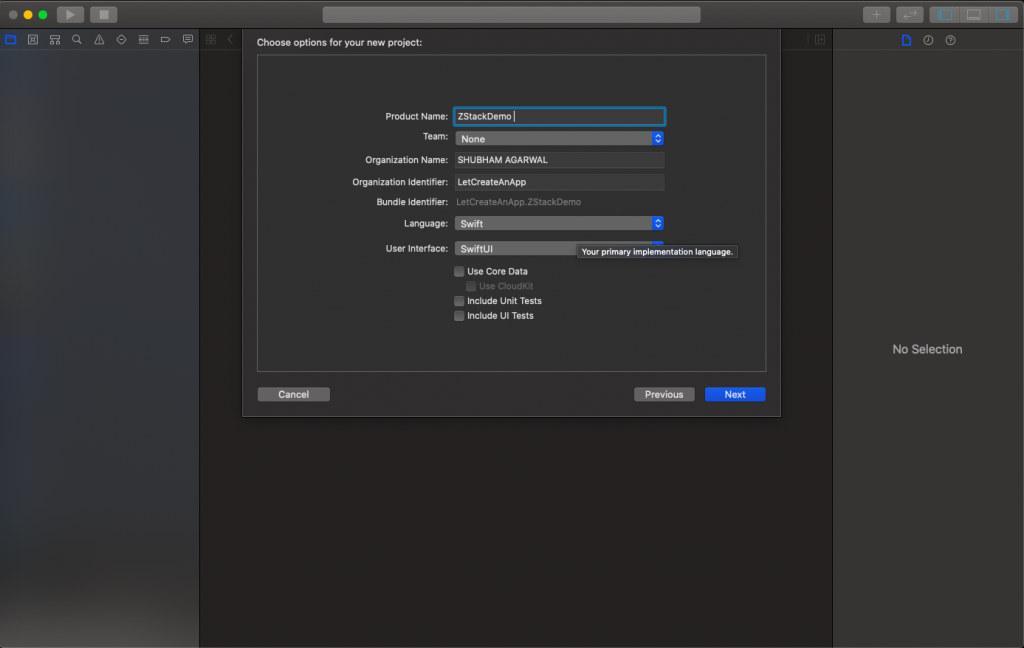
Next, give a proper name to the project and make sure to select the user interface should be SwiftUI, and create the project.
2. Let’s Start with the Background image.
We need to create ZStack first as a parent and add the image as a first child in the content.swift file, be sure that the background image should be placed in the asset folder.
import SwiftUI

struct ContentView: View {

    var body: some View {
        ZStack {
            Image("demo")
                .resizable()
                .scaledToFill()
                .clipped()
                .frame(width: UIScreen.main.bounds.width)
                .edgesIgnoringSafeArea(.all)
        }
    }
}

struct ContentView_Previews: PreviewProvider {
    static var previews: some View {
        ContentView()
    }
}
Add the above code to see the image in the background.
3. Add Logo and Buttons.
Let’s add a logo and two Buttons in the ZStack below the Image View. Logo and Buttons are the second children of the ZStack so they will come on top of the first child. We can create multiple children on a single stack and also create ZStack as a child to support multiple parent-child hierarchies.
import SwiftUI

struct ContentView: View {
    var screenSize = UIScreen.main.bounds
    var body: some View {
        ZStack {
            Image("demo")
                .resizable()
                .scaledToFill()
                .clipped()
                .frame(width: UIScreen.main.bounds.width)
                .edgesIgnoringSafeArea(.all)
            VStack(spacing: 150) {
                Image("CirecleIcon")
                    .resizable()
                    .frame(width: 200, height: 200)
                VStack(spacing: 20) {
                    Button(action: {
                        print("Login Button Click")
                    }) {
                        Text("Login")
                            .foregroundColor(.white)
                            .font(.system(size: 22))
                    }.frame(width: screenSize.width - 40, height: 50)
                        .background(Color.orange)
                        .cornerRadius(5)
                }
                Spacer()
            }.padding(.top, 50 )

        }
    }
}

struct ContentView_Previews: PreviewProvider {
    static var previews: some View {
        ContentView()
    }
}
In the above code, we have first added background Image and then we have added VStack to logo image and 2 buttons in it. But we have different vertical spacing between the logo image and 2 buttons so we need to add one more vertical stack to achieve that. We have nested VStack to provide proper spacing between the logo image and space between 2 buttons. This is the final code and tries to run the application you will see the output something which we have seen earlier.
Now you can create views on top of one another using ZStack.
I hope you like this tutorial and if you want any help let me know in the comment section.— there is way more to come! You can follow me on Youtube, Instagram, and Twitter to not miss out on all future Articles and Video tutorials.
. . .
I am really happy you read my article! If you have any suggestions or improvements of any kind let me know! I’d love to hear from you! ????


Great tutorial. It’s really help.
I will immediately grab your rss as I can’t in finding your email subscription link or e-newsletter service. Do you have any? Kindly let me know so that I may just subscribe. Thanks.