DropDown menu is not a provided functionality in iOS application development, we are dependent on UIPicker or AlertSheet which doesn’t look like Dropdown Menu or we need to use the third-party library for this functionality.
In this tutorial, we are going to learn about how we can create a Dropdown menu in Swift.
If you want to watch the video tutorial of this article, here you go:
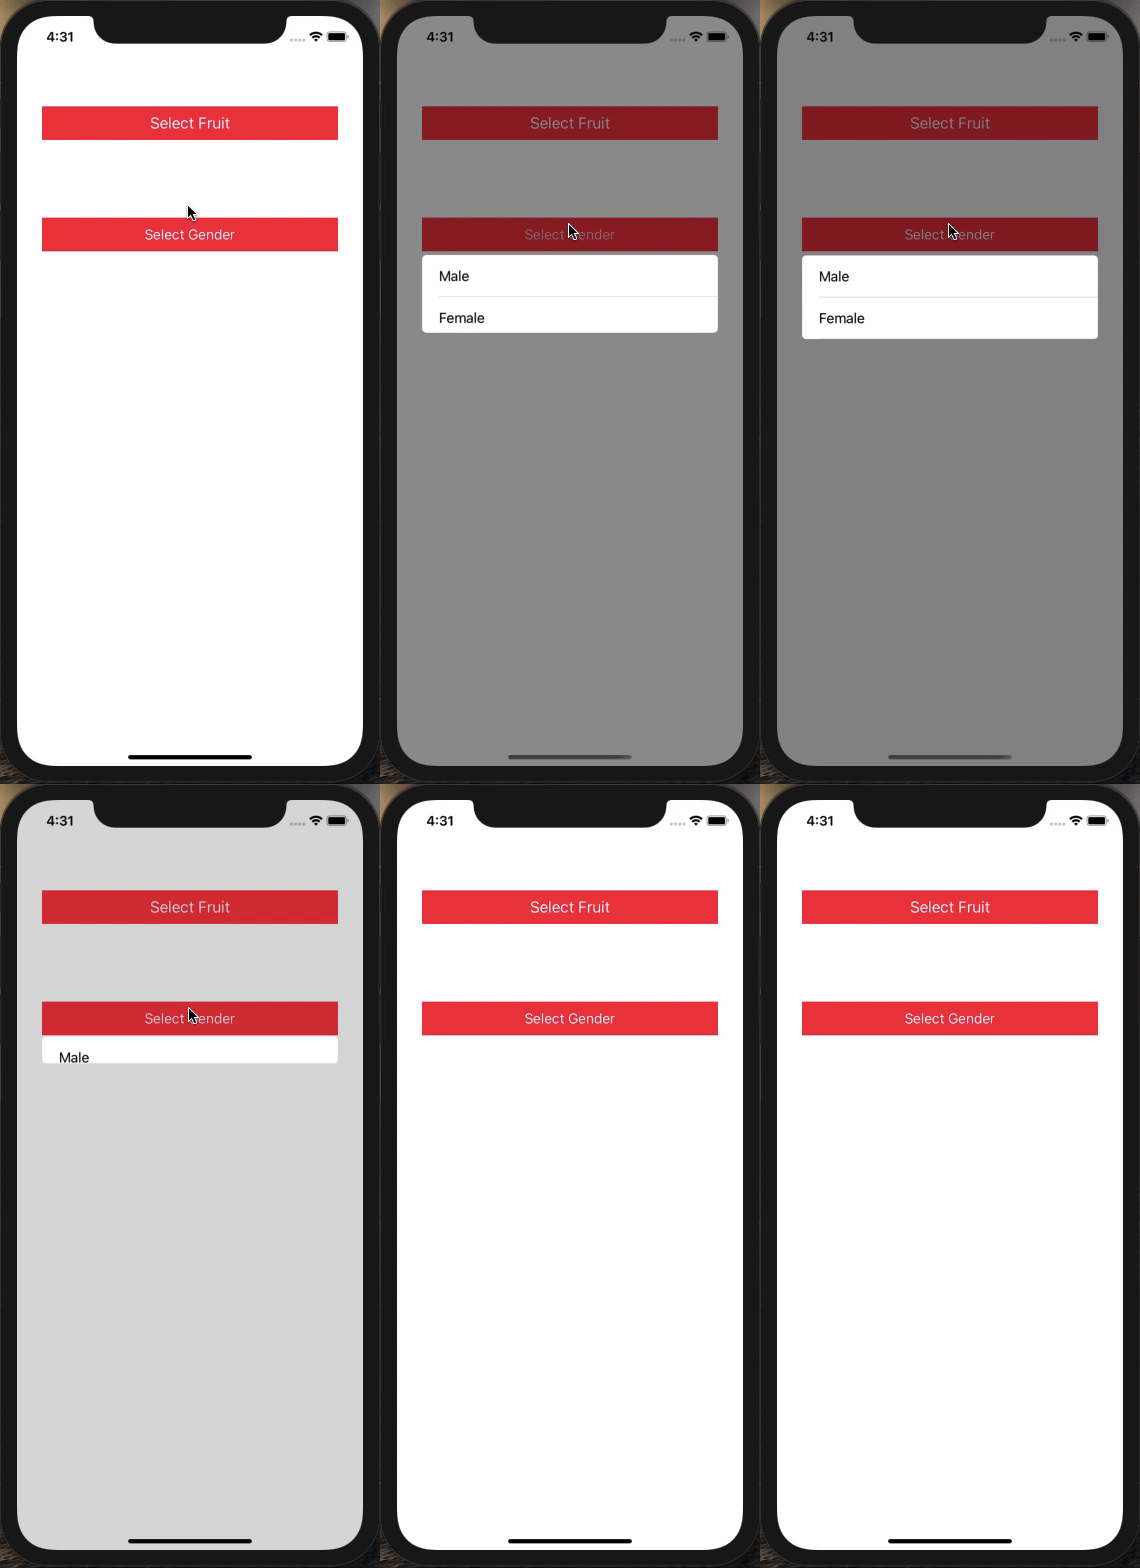
Final Output
1. Create a New Swift Project
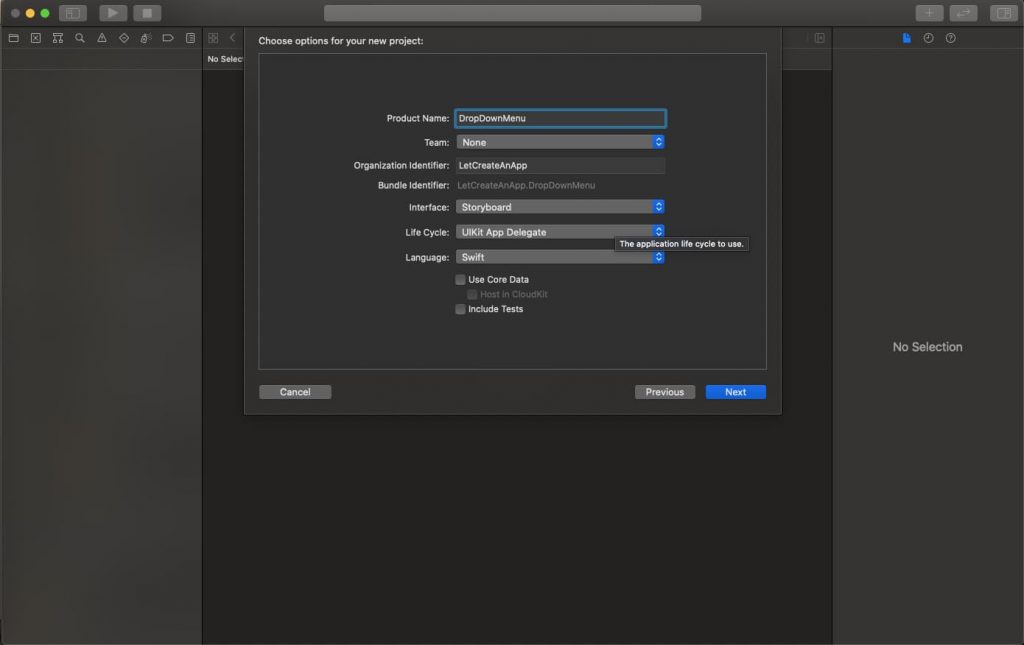
Open Xcode, Select Single View Application and click on next and give a proper name to the project and make sure to select the user interface should be Swift, and create the project.
2. Create Basic UI
First, we need to create the basic UI. we need to take the button on the Storyboard and create an IBOutlet and IBAction of that button on the ViewController.swift class.

3. Adding UITableView and Transparent View
Now we will create an UITableView and Transparent view which will show when the user taps on any of the UIButton.
UITableView and Transparent view are completely dynamic, so we need to create these views when the user taps on any of the buttons and removes them when the user selects an option or taps anywhere on the screen.
let transparentView = UIView()
let tableView = UITableView()
Now we need to create functions for Adding and Removing this UITableView and Transparent view on the screen. UITableview will create according to the screen size so we need to do some kind of a calculation to find the size of UITableview.
func addTransparentView(frames: CGRect) {
         let window = UIApplication.shared.keyWindow
         transparentView.frame = window?.frame ?? self.view.frame
         self.view.addSubview(transparentView)

         tableView.frame = CGRect(x: frames.origin.x, y: frames.origin.y + frames.height, width: frames.width, height: 0)
         self.view.addSubview(tableView)
         tableView.layer.cornerRadius = 5

         transparentView.backgroundColor = UIColor.black.withAlphaComponent(0.9)
         tableView.reloadData()
         let tapgesture = UITapGestureRecognizer(target: self, action: #selector(removeTransparentView))
         transparentView.addGestureRecognizer(tapgesture)
         transparentView.alpha = 0
         UIView.animate(withDuration: 0.4, delay: 0.0, usingSpringWithDamping: 1.0, initialSpringVelocity: 1.0, options: .curveEaseInOut, animations: {
             self.transparentView.alpha = 0.5
             self.tableView.frame = CGRect(x: frames.origin.x, y: frames.origin.y + frames.height + 5, width: frames.width, height: CGFloat(self.dataSource.count * 50))
         }, completion: nil)
     }
@objc func removeTransparentView() {
let frames = selectedButton.frame
UIView.animate(withDuration: 0.4, delay: 0.0, usingSpringWithDamping: 1.0, initialSpringVelocity: 1.0, options: .curveEaseInOut, animations: {
self.transparentView.alpha = 0
self.tableView.frame = CGRect(x: frames.origin.x, y: frames.origin.y + frames.height, width: frames.width, height: 0)
}, completion: nil)
} 4. Changing the Frames and Data Source
Now, we need to show Tableview and Transparent view with the click of a button. With different buttons, we need to show different options on the Tableview.
var selectedButton = UIButton()
var dataSource = [String]()
@IBAction func onClickSelectFruit(_ sender: Any) {
dataSource = ["Apple", "Mango", "Orange"]
selectedButton = btnSelectFruit
addTransparentView(frames: btnSelectFruit.frame)
}
@IBAction func onClickSelectGender(_ sender: Any) {
dataSource = ["Male", "Female"]
selectedButton = btnSelectGender
addTransparentView(frames: btnSelectGender.frame)
} 5. Updating selected value & Removing View
When a user clicks any option of tableview, its delegate method gets called and updates the button title, and removes the transparent view.
func tableView(_ tableView: UITableView, didSelectRowAt indexPath: IndexPath) {
         selectedButton.setTitle(dataSource[indexPath.row], for: .normal)
         removeTransparentView()
     }
Some of the action still need to add on the ViewController.swift file which you can check on the project.
The source code of the DropDown Menu can be downloaded at LetCreateAnApp repository Github.
I hope you like this tutorial and if you want any help let me know in the comment section.— there is way more to come! You can follow me on Youtube, Instagram, and Twitter to not miss out on all future Articles and Video tutorials.
. . .
I am really happy you read my article! If you have any suggestions or improvements of any kind let me know! I’d love to hear from you! ????





Hi, I was wondering how it was possible to get the title of the button selected at each drop down menu. For example, how would I be able to get “Apple” from your “Select Fruit” and “Female” for “Gender” in two different variables so I am able to enter this into a database?
Thanks
Pingback: How to Create Drop-Down List/Menu in Swift - Let Create An App
How can I design the dropdown list with key and value? Each key matches its value. When I select a drop-down item, I want to print the index, key, and value.
These are actually great ideas in concerning blogging. You have touched some pleasant points here. Any way keep up wrinting.