In this tutorial, we’ll look at how we can build a very simple drawing app. We will learn how we can change the color, stroke size, opacity, and even save the created drawing.
If you want to watch the video tutorial of this article instead, here you go:
Final Output:

1. Create a New Swift Project
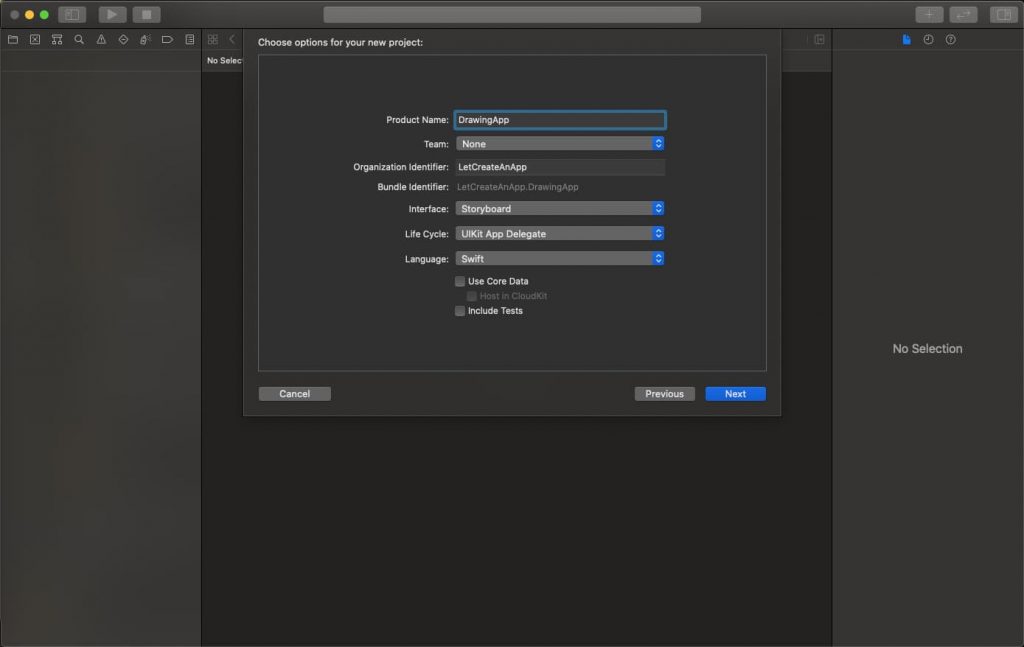
Open Xcode, Select Single View Application and click on next and give a proper name to the project and make sure to select the user interface should be Swift, and create the project.
2. Design the Bottom Layout
First, we need to design the Bottom layout, You can design this thing according to your own need. I have simply taken UIView in the bottom and take some UIButton for save, error, undo functionality. UICollectionView is taken for showing colours and UISlider for opacity and stroke size.
Now take the IBActions and IBOutlets of all the UIElements on ViewController class.
The design look something like this. (You can choose your design also)

3. Start Drawing
Now take a new swift class named it CanvasView.swift and create one struct which holds the properties.
import UIKit

struct TouchPointsAndColor {
    var color: UIColor?
    var width: CGFloat?
    var opacity: CGFloat?
    var points: [CGPoint]?

   init(color: UIColor, points: [CGPoint]?) {
       self.color = color
       self.points = points
   }
}
Now we need to implement touch methods so when the user touches the view it will draw lines on the view.
Create a class CanvasView which is subclass of UIView type.
class CanvasView: UIView {

     var lines = [TouchPointsAndColor]()
     var strokeWidth: CGFloat = 1.0
     var strokeColor: UIColor = .black
     var strokeOpacity: CGFloat = 1.0

     override func draw(_ rect: CGRect) {
         super.draw(rect)

       guard let context = UIGraphicsGetCurrentContext() else {
             return
         }

         lines.forEach { (line) in
             for (i, p) in (line.points?.enumerated())! {
                 if i == 0 {
                     context.move(to: p)
                 } else {
                     context.addLine(to: p)
                 }
                 context.setStrokeColor(line.color?.withAlphaComponent(line.opacity ?? 1.0).cgColor ?? UIColor.black.cgColor)
                 context.setLineWidth(line.width ?? 1.0)
             }
             context.setLineCap(.round)
             context.strokePath()
         }
     }

     override func touchesBegan(_ touches: Set<UITouch>, with event: UIEvent?) {
         lines.append(TouchPointsAndColor(color: UIColor(), points: [CGPoint]()))
     }

     override func touchesMoved(_ touches: Set<UITouch>, with event: UIEvent?) {
         guard let touch = touches.first?.location(in: nil) else {
             return
         }

         guard var lastPoint = lines.popLast() else {return}
         lastPoint.points?.append(touch)
         lastPoint.color = strokeColor
         lastPoint.width = strokeWidth
         lastPoint.opacity = strokeOpacity
         lines.append(lastPoint)
         setNeedsDisplay()
     }
 }
Now we need to take a view on a main.storyboard and assign CanvasView.swift to that view.
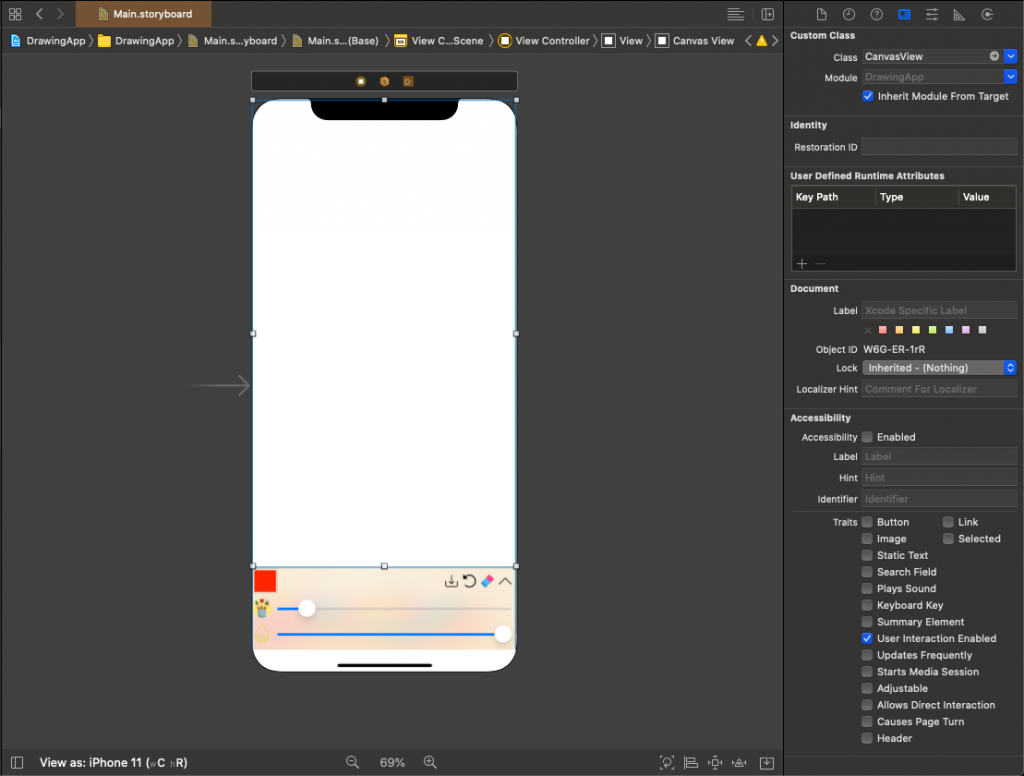
After that, we need to take the @IBOutlet of this view on the ViewController.swift file.
@IBOutlet weak var canvasView: CanvasView! Now we can run the Application and test the drawing functionality, if all steps done correctly you are able to draw the things on the screen.
But still, some functionality is missing like change the colour, stroke size, opacity, save. So now we will implement all those functions.
3. Clear Canvas
For removing all the drawing on single click add this method in CanvasView class.
func clearCanvasView() {
       lines.removeAll()
       setNeedsDisplay()
   }
4. Undo Drawing
For undoing any line drawing on the canvas add this method in CanvasView class.
func undoDraw() {
        if lines.count > 0 {
           lines.removeLast()
           setNeedsDisplay()
       }
    }
5. Save Drawing
Saving the drawing we need to create the extension of UIView and add this method in that extension.
func takeScreenshot() -> UIImage {
         // Begin context
      UIGraphicsBeginImageContextWithOptions(self.bounds.size, false, UIScreen.main.scale)
         // Draw view in that context
         drawHierarchy(in: self.bounds, afterScreenUpdates: true)
         // And finally, get image
     let image = UIGraphicsGetImageFromCurrentImageContext()
         UIGraphicsEndImageContext()

         if (image != nil) {
             return image!
         }
         return UIImage()
     }
Some of the action still need to add on the ViewController.swift file which you can check on the project file.
The source code of the Drawing app can be downloaded at LetCreateAnApp repository Github.
I hope you like this tutorial and if you want any help let me know in the comment section.— there is way more to come! You can follow me on Youtube, Instagram, and Twitter to not miss out on all future Articles and Video tutorials.
. . .
I am really happy you read my article! If you have any suggestions or improvements of any kind let me know! I’d love to hear from you! ????




Hi